Choosing the right Bicycle Pedals is one of the fastest ways to improve comfort, control, and efficiency—often with a smaller budget than wheels or drivetrain upgrades. This guide explains the main pedal types, how they work, key benefits, maintenance essentials, and realistic pricing. It also highlights practical selection criteria and what Tesno’s current flat/platform-focused catalog offers.
Video Guide: A broad, beginner-friendly walkthrough of pedal types, terminology, and what matters when choosing Bicycle Pedals.
What is Bicycle Pedals?
Bicycle Pedals are the components you push with your feet to turn the bike’s crankset, converting your leg force into drivetrain motion. They screw into the crank arms and provide a platform or a retention interface for your shoes. Pedal choice affects stability, grip, efficiency, and long-ride comfort.
Video Guide: A clear overview of common Bicycle Pedals categories and how they differ in use.
Core pedal categories and where Tesno fits
Most Bicycle Pedals fall into two broad families: platform/flat pedals (shoe rests on a grippy surface) and **clipless pedals (shoe “clips in” via a cleat for retention). Tesno’s current catalog is focused on flat and platform pedals—including aluminum extruded/CNC bodies and selected nylon designs—rather than clipless, magnetic, or power-meter pedals.
Key terms you’ll see when comparing pedals:
- Body material: aluminum (durable, crisp machining), nylon/composite (lighter feel, cost-effective, less “cold” underfoot)
- Axle/spindle: commonly Cr-Mo steel; some catalogs offer Ti upgrades for weight reduction
- Bearings: DU bushings (simple, cost-effective) vs sealed bearings (smoother, better contamination resistance)
- Platform size: larger platforms generally add stability; smaller can reduce strikes on technical terrain
| Pedal family | Typical shoe interface | Best for | Trade-offs | Tesno catalog status |
|---|---|---|---|---|
| Flat/Platform | Any stiff-soled shoe (pins bite tread) | MTB, commuting, casual, jump/park, wet conditions | Less “locked-in” than clipless; relies on shoe tread | Yes (primary focus) |
| Clipless | Cleated cycling shoe | Road efficiency, XC racing, high-cadence | Learning curve; walkability depends on cleat | Not shown |
| Magnetic | Magnetic attraction plate | Urban, easy release | Limited standardization, variable retention | Not shown |
| Power-meter | Any of the above + sensors | Training with power | Higher cost, battery/service needs | Not shown |
Tesno Pro Tip: I treat “pedal type” as a shoe-and-ride-style decision first. If you’re not ready to commit to cleated shoes, a quality flat/platform pedal with proper pin layout and sealed bearings is the most universally compatible upgrade you can make.
How Does Bicycle Pedals Work?
Bicycle Pedals work by rotating around a spindle threaded into the crank arm; your foot force creates torque that turns the crank, chainring, chain, and rear wheel. The pedal body spins on internal bearings or bushings to reduce friction, while pins or retention mechanisms keep your shoe stable and controlled.
Video Guide: Practical explanation of how different Bicycle Pedals interfaces affect fit, stability, and pedaling mechanics.
Power transfer, bearings, and traction—what actually happens
When you push down (and sometimes pull up), the pedal transmits force through: shoe → pedal platform/retention → pedal body → spindle → crank arm. Two design areas largely determine “feel” and durability:
- Rotation system (bearings/bushings)
- DU bushing: simple sleeve-style support; good value and impact resistance, but can feel less “buttery” under load if contaminated or worn.
- Sealed bearings: typically smoother and better protected; tends to hold performance longer in wet/dusty riding.
- Foot retention (platform pins or clip mechanism)
- Flat/platform pedals: threaded pins create mechanical bite into shoe tread; larger platforms distribute pressure and improve stability.
- Clipless: cleat engagement provides consistent foot position and high retention; requires compatible shoes and setup.
A quick functional checklist for smooth pedaling and control:
- Confirm the pedal spins smoothly with no gritty feel (bearing health)
- Check for side-to-side play (worn bearings/bushings or loose hardware)
- Ensure pins are present, evenly tightened, and not rounded off (traction)
- Verify correct installation: right pedal tightens clockwise; left pedal tightens counterclockwise
Tesno Pro Tip: I always judge a pedal by two things during a hand-check: spin smoothness under light finger pressure and zero lateral play. If either fails out of the box, it won’t “break in”—it will only wear faster.
What are the benefits of Bicycle Pedals?
The right Bicycle Pedals improve control, comfort, and pedaling consistency. Larger, well-pinned platforms stabilize your foot and reduce slips, especially in wet or rough terrain. Better bearings cut friction and maintain smooth rotation longer. Overall, pedals can meaningfully boost confidence and efficiency without changing your bike’s geometry.
Video Guide: How pedal choice impacts grip, stability, and performance—especially for mountain biking and flat pedals.
Practical benefits you can feel on the first ride
Pedal benefits show up in three areas: handling, comfort, and reliability. Here’s what to expect when upgrading or choosing correctly:
- More predictable grip: quality pins + concave platform reduce foot bounce and slips
- Better bike control: stable foot placement helps weighting the bike correctly (cornering, drops, braking)
- Reduced foot fatigue: wider platform spreads pressure; smoother rotation reduces micro-resistance
- Improved durability: sealed bearings and robust spindles handle water, grit, and impacts better
- Safer starts/stops (flats): immediate foot release—ideal for commuting and technical learning phases
| Benefit | Most influenced by | Who notices it most |
|---|---|---|
| Grip and stability | Pin layout, platform shape/size, shoe tread | MTB, wet-weather riders |
| Smooth pedaling | Bearing quality + sealing | High-mileage commuters, endurance riders |
| Confidence/skills | Platform size, clearance, traction | New MTB riders, jump/park riders |
| Longevity | Spindle material, sealing, serviceability | All-weather riders |
Tesno Pro Tip: If you’re switching to flats for technical riding, pair grippy pedals with a flatter, stickier-soled shoe. In my experience, the shoe choice can double the traction improvement compared to pedals alone.
How to maintain a Bicycle Pedals?
Maintaining Bicycle Pedals mainly means keeping bearings/bushings clean, checking for play, and replacing damaged pins. Regular inspection prevents seized spindles, noisy rotation, and reduced grip. For flat/platform pedals, pin care is as important as bearing care, because rounded pins dramatically reduce control in wet or muddy conditions.
Video Guide: Step-by-step guidance on selecting and caring for pedals, including practical checks that prevent premature wear.
A simple maintenance routine that prevents most failures
Use this schedule as a baseline; adjust for rain, mud, and winter road salt.
- After wet or muddy rides (quick check, 2 minutes)
- Rinse gently (avoid blasting bearing seals with high-pressure water)
- Spin pedals and listen for grinding
- Check pins for missing or bent heads
- Monthly (or every 300–500 km)
- Check lateral play by pushing the pedal body side-to-side
- Inspect spindle area for rust staining (early sign of water ingress)
- Tighten/replace pins as needed (use threadlocker if recommended)
- Seasonally (service interval)
- If serviceable: remove end cap, extract spindle, clean old grease
- Repack with quality waterproof grease
- Replace worn DU bushings or bearings if gritty or loose
Common symptoms and likely causes:
| Symptom | Likely cause | Action |
|---|---|---|
| Gritty rotation | Contaminated bearing/DU bushing | Clean + regrease; replace if pitted |
| Side-to-side play | Worn bushing/bearing or loose hardware | Service/replace internals; torque check |
| Clicking under load | Loose pins, spindle issues, pedal threads | Check pins; re-torque pedals; inspect spindle |
| Reduced grip | Rounded/missing pins | Replace pins; verify shoe tread |
Tesno Pro Tip: I avoid pressure washers on pedals—most “mystery bearing deaths” come from forcing water past seals. A gentle rinse and a wipe-down preserves bearing life far better than aggressive cleaning.
What is the price of Bicycle Pedals?
Bicycle Pedals prices vary by materials, bearings, and brand. Entry-level nylon/composite flats are usually the lowest cost, while CNC aluminum bodies and sealed bearings increase price due to machining and hardware quality. Premium options add lighter spindles, better sealing, and replaceable components that extend service life.
Video Guide: A ranked discussion of pedal value and pitfalls, useful for aligning budget with real-world performance.
Typical price bands and what you’re paying for
Pricing varies by region and retailer, but the value drivers are consistent: body construction, spindle material, and bearing system.
- Budget (basic flats): composite bodies, simpler internals, fewer pins or softer hardware
- Mid-range (best value for many): aluminum bodies, replaceable pins, improved sealing
- Premium (durability/weight focus): CNC bodies, higher-end sealed bearings, lighter spindle options (where offered), better finishing and serviceability
| Price band | What to expect | Best for |
|---|---|---|
| Entry | Basic grip, adequate for casual riding | City bikes, occasional riders |
| Mid-range | Strong grip, better bearings, replaceable pins | MTB, commuters, frequent riders |
| Premium | Lower weight, refined sealing, long service intervals | High-mileage, harsh conditions |
Tesno Pro Tip: I recommend spending enough to get sealed bearings and replaceable pins if you ride in rain or dirt. That combination usually costs less over time than buying cheap pedals repeatedly.
Key Features & Comparison
Bicycle Pedals should be compared by platform size, body material, spindle options, bearing type, and weight. These factors determine grip, stability, durability, and long-term service cost. Tesno’s catalog is centered on flat/platform pedals, offering multiple platform dimensions, DU or sealed bearings, and several axle materials.
Video Guide: How to match flat pedal shape, pins, and platform size to your riding style and priorities.
Spec-driven comparison using Tesno catalog ranges
Based on our internal data and market analysis, here is the breakdown:
| Feature | Why it matters | Tesno catalog range / status (confirmed) | What to choose |
|---|---|---|---|
| Pedal type | Determines shoe compatibility and retention | Flat/platform only (no clipless/magnetic/power) | Flats for versatility and easy foot release |
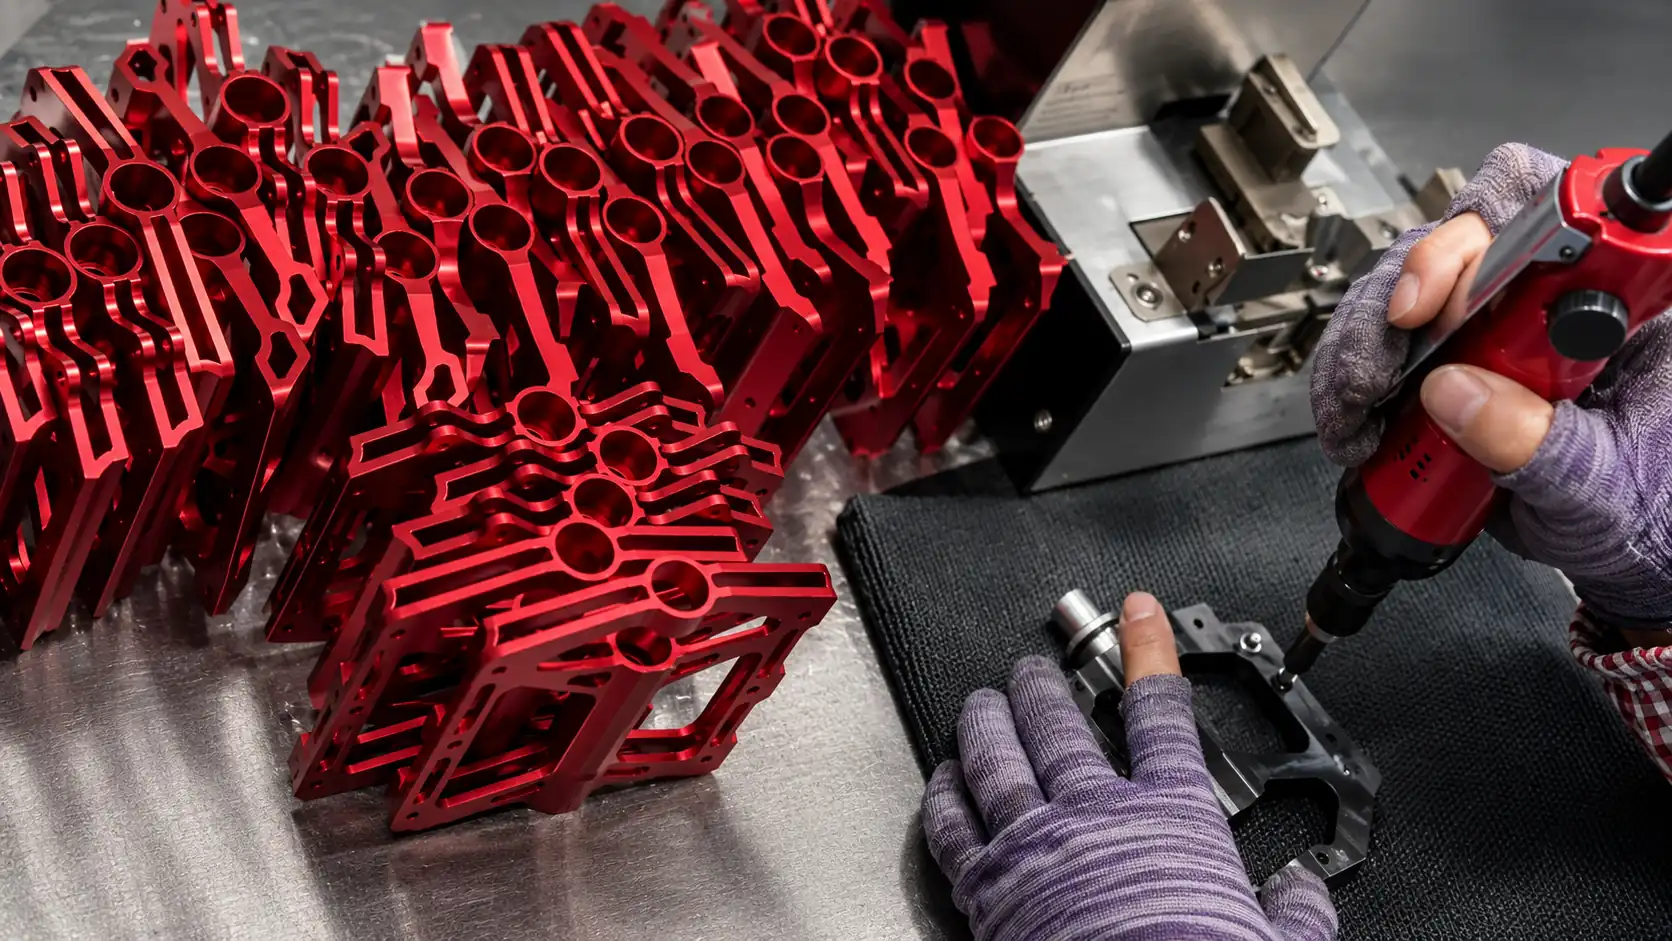
| Body construction | Strength, impact resistance, longevity | Aluminum extruded, CNC-machined; some one-piece nylon | CNC aluminum for hard use; nylon for value |
| Bearing system | Smoothness and contamination resistance | DU bushing or sealed-bearing configurations | Sealed bearings for wet/dusty riding |
| Spindle material | Strength vs weight | Cr-Mo; optional Ti alloy; 10B21; Cr-Mo/10B21 | Cr-Mo for durability; Ti for weight focus (if available) |
| Platform dimensions | Stability and foot support | 74 × 89 × 21 mm to 118 × 115 × 25 mm | Larger for control; smaller for clearance |
| Weight (pair) | Rotational feel and total bike weight | 232 g to 435 g per pair | Lighter for efficiency; heavier can be tougher |
Tesno Pro Tip: If you’re unsure on size, I default to a medium-to-large platform for MTB and commuting—it’s the quickest way to get stable foot placement, especially when your technique or shoe tread isn’t perfect.
Cost & Buying Factors
Buying Bicycle Pedals is about matching riding discipline, shoe choice, platform size, bearing durability, and serviceability to your budget. Flat/platform pedals prioritize grip and stability, while clipless prioritizes locked-in efficiency (though Tesno’s current catalog focuses on flats). The best value usually comes from sealed bearings, replaceable pins, and a properly sized platform.
Video Guide: Road-oriented pedal considerations that help you understand when clipless makes sense versus sticking with versatile platforms.
A practical checklist for choosing the right pedals
Use this decision flow to avoid mismatches:
- Start with your riding type
- MTB / gravel adventure / commuting → flats/platforms are versatile and confidence-inspiring
- Road racing / structured training → clipless often preferred (requires cleated shoes)
- Choose platform size based on stability vs clearance
- Larger platforms: better support and comfort
- Smaller platforms: less pedal-strike risk in rocks/lean angles
- Pick internals for your environment
- Wet, dusty, winter salt: prioritize sealed bearings and good sealing design
- Dry, occasional riding: DU can be acceptable if quality is good and serviceable
- Plan for wear items
- Replaceable pins (and pin availability)
- Service access (end caps, spares)
- Spindle strength for heavier riders or aggressive riding
| Buyer priority | Best-matching pedal traits |
|---|---|
| Maximum grip | Aggressive pins + concave platform + larger size |
| Low maintenance | Sealed bearings + good sealing + corrosion-resistant hardware |
| Lowest cost | Nylon/composite body + simpler internals |
| Lowest weight | Lighter body + lighter spindle options (when available) |
Tesno Pro Tip: I choose pedals the same way I choose tires: I buy for my worst conditions. If you ride even occasionally in rain or grit, sealed bearings and replaceable pins are the “minimum spec” for reliable Bicycle Pedals.
Conclusion
Bicycle Pedals directly affect how securely you connect to the bike, how smoothly power transfers, and how confident you feel on technical terrain or in traffic. For most riders, a well-sized flat/platform pedal with strong pins and sealed bearings delivers the best blend of control and simplicity. Tesno’s current lineup is purpose-built around that flat/platform sweet spot—making selection straightforward once you match size, bearings, and materials to your riding.
Next steps to choose the right Tesno-style setup
- Pick a platform size that matches your shoe and stability needs
- Choose sealed bearings if you ride in wet/dusty conditions
- Confirm spindle material based on durability vs weight goals
- Pair with a grippy flat shoe to fully realize the pedal’s traction potential
Tesno Pro Tip: If you want one “do-it-all” choice, I’d prioritize a mid-weight aluminum platform with sealed bearings and serviceable pins—then spend the remaining budget on shoes with a flat, sticky outsole for the biggest real-world improvement.